Maintaining your hearing aids is crucial for ensuring they provide the best possible performance and longevity. One important aspect of this maintenance is inspecting and replacing the hearing aid tubing. Hearing aid tubing plays a vital role in transmitting sound from the microphone to the receiver, which then converts it into a form you can hear clearly. However, over time, these tubes can wear out, affecting the quality of the sound you receive.
Therefore, it is essential to learn about the different types of hearing aid tubing, how to identify when it needs replacing, the tools required, and step-by-step instructions for both removing old tubing and installing new ones. By doing so, you can ensure that your hearing aids continue to function optimally, providing you with clear and reliable sound.
What Is Hearing Aid Tubing?
Hearing aid tubes are small, flexible conduits designed to carry sound from the hearing aid’s microphone to the ear canal. These tubes play a crucial role in delivering clear and accurate sound to the user. The design of the tube allows sound to travel efficiently using a sinusoidal waveform, ensuring that the audio signals are transmitted with minimal distortion and maximum clarity.
There are various types of hearing aid tubes, each suited to different styles of hearing aids and user needs. Proper maintenance and timely replacement of these tubes are essential for maintaining the optimal performance of your hearing aids. By understanding the function and types of hearing aid tubes, you can ensure that your hearing aid continues to provide the best possible listening experience.
Types of Hearing Aid Tubing
Hearing aid tubes come in different types to suit various hearing aid models and user needs. Therefore understanding the difference between these tubes can help you choose the right one for your hearing aid.
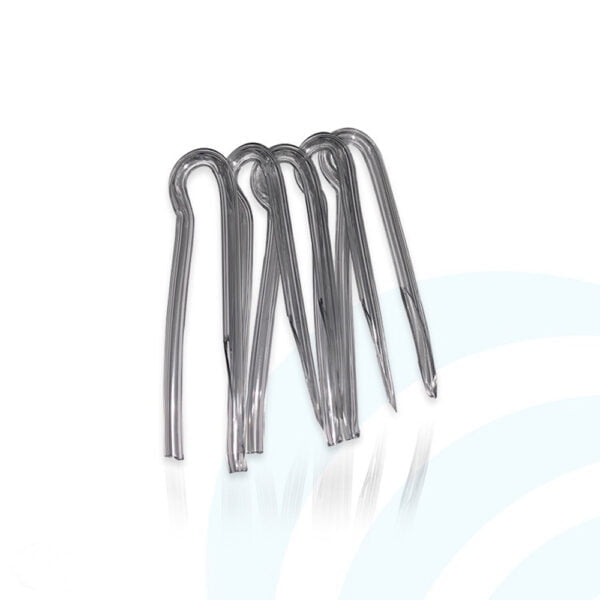
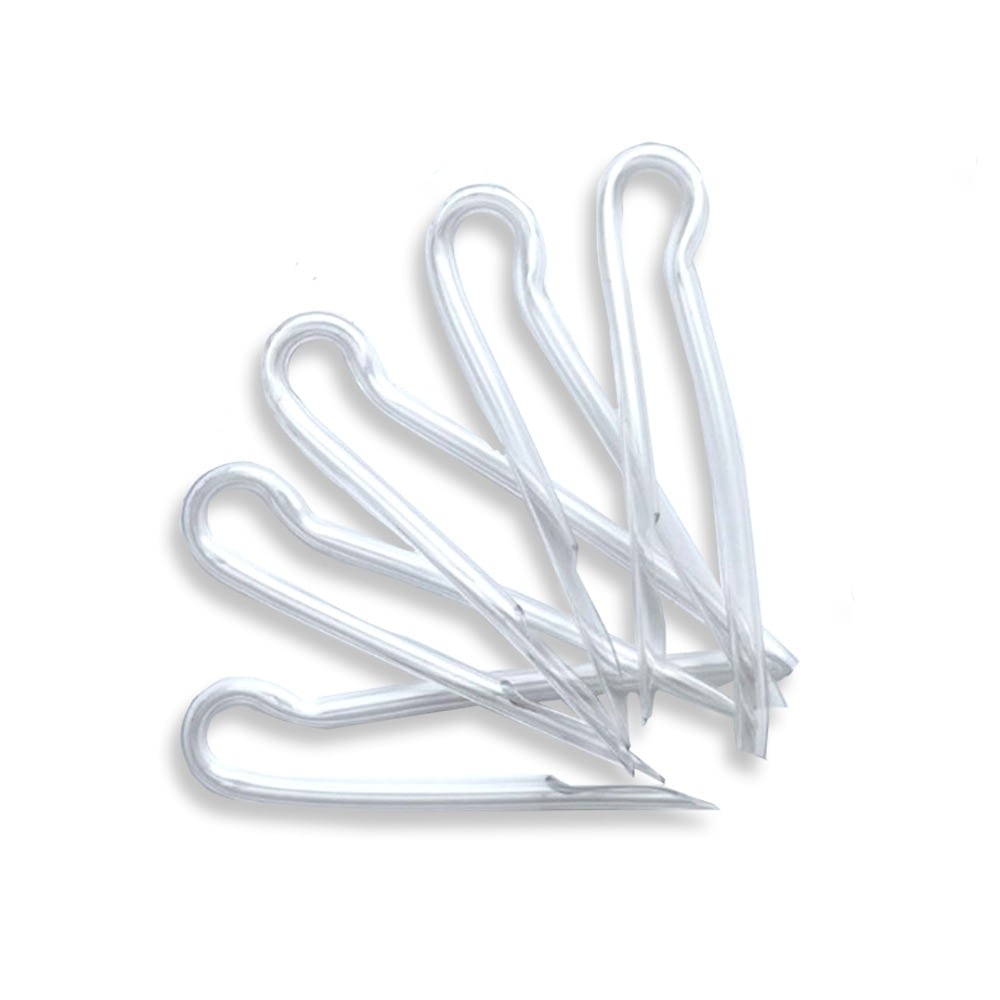
Pre-Bent Tubes
Pre-bent tubes are commonly used with hearing aids that have custom earmoulds. These tubes are universally designed to fit any hearing aid model that requires a custom mould. Furthermore, they provide a reliable pathway for sound to travel from the hearing aid to the ear canal.
Pre-bent tubes come in three different wall thicknesses options: standard, medium, and thick.
The choice of wall thicknesses depends on the user’s degree of hearing loss:
- Standard Wall: Suitable for mild to moderate hearing loss.
- Medium Wall: Offers additional durability and is suitable for moderate to severe hearing loss.
- Thick Wall: Best for severe to profound hearing loss, providing extra durability and minimising feedback.
Moreover, pre-bent tubes come in moisture-free options, available in medium or thick walls. These are designed to prevent moisture build-up inside the tube, which can affect sound quality and the longevity of the hearing aid.
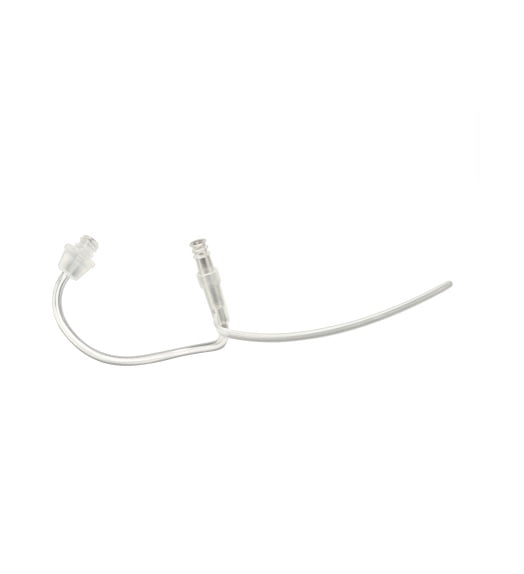
Thin Tubes
Thin tubes are used with hearing aids that have domes instead of custom earmoulds. Typically, they are smaller in diameter and are less noticeable than pre-bent tubes, therefore making them a popular choice for users who prefer a more discreet hearing aid.
Thin tubes are specific to the brand and model of the hearing aid. What this means is that each tube is carefully designed to match the acoustic characteristics and physical design of a particular hearing aid model. This level of specificity ensures optimal performance and comfort for the user.
Colour Coding for Left and Right Ears:
To make it easier to distinguish between the tubes for the left and right ears, thin tubes are colour coded. Typically, blue text or markings indicate the left ear, while red text or markings indicate the right ear. This colour coding helps users easily identify and correctly fit the tubes to their hearing aids.
When Do I Change My Hearing Aid Tubing?
Keeping your hearing aids in top shape means paying attention to when the tubing needs replacing. Here’s how to know when it’s time for a change:
1) Signs of Wear and Tear
- Discoloration: If your tubing is turning yellow or brown, it’s showing its age and needs replacing.
- Cracks and Splits: Notice any cracks or splits? That’s a clear sign it’s time for new tubing.
- Stiffness: Your tubing should be flexible. If it’s feeling stiff or brittle, it’s past its prime.
2) How to Test Tubing Flexibility
- Squeeze Test: Gently squeeze the tubing. If it quickly returns to its shape, it’s good. If it stays bent, it’s time for a replacement.
- Bend Test: Carefully bend the tubing. Any cracking or splitting means it’s time to switch it out.
3) Other Indications That Tubing Needs to Be Replaced
- Sound Quality Issues: If you notice distorted of muffled sound, the tubing might be blocked or damaged.
- Moisture Buildup: Frequent condensation inside the tubing is a sign it needs replacing.
- Frequent Detachment: If the tubing keeps detaching from the hearing aid or earmould, it might be stretched out and need replacing.
Regular checks and maintenance ensure your hearing aids deliver the best sound quality. If you’re unsure about your tubing’s condition, don’t hesitate to consult with a hearing care professional.
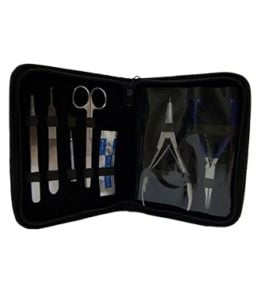
Tools Needed for Replacing Hearing Aid Tubing
Replacing pre-bent hearing aid tubes requires some specific tools to ensure a precise and secure fit. Here’s a list of what you’ll need:
1) Cutters
Ensuring the tubing is the correct length is crucial for comfort and sound quality. Cutters help achieve a precise cut.
2) Pliers
Next, you’ll use pliers to shape and guide the tubing into place. Moreover, they help ensure the tubing is inserted correctly without damage.
3) Tubing Extractor
Removing old, worn-out tubing can be challenging. An extractor makes this process easier and prevents potential damage to the hearing aid.
4) Tubing Threader
This tool assists in threading the new tubing through the earmould with ease. Some threaders come combined with an extractor for added convenience.
5) Glue
Finally, some tubing may require additional securing. Appropriate glue ensures the tubing stays in place without harming the hearing aid. It’s important to use glue that’s suitable for hearing aids to avoid any damage to the device.
Note on Thin Tubes:
Fortunately, thin tubes do not require any tools for changing. They are designed for easy replacement by simply screwing them on and off. As a result, this makes maintenance simpler for users who use hearing aids with domes.
With the right tools and a bit of know-how, replacing hearing aid tubing can be straightforward and ensure your hearing aids continue to perform at their best.
Step-by-Step Guide to Replacing Hearing Aid Tubing
Replacing hearing aid tubing might seem daunting, but with the right tools and guidance, it can be a simple process. Follow these steps to ensure your tubing is replaced correctly and securely:
1) Measuring and Cutting New Tubing
- Remove the Old Tubing: Gently detach the old tubing from the hearing aid and earmould. If it’s glued, use a tubing extractor to carefully remove it. Clean the earmould and hearing aid to remove any residue or debris.
- Measure the New Tubing: Lay the old tubing next to the new tubing to use it as a measuring guide. Using your cutters, trim the new tubing to match the length of the old. Ensure the cut is clean and straight for a proper fit.
2) Threading the New Tubing Through the Earmould
- Prepare the Tubing: Clean the new tubing to ensure it’s free from dust and debris. Use a tubing threader to help guide the new tubing through the earmould.
- Insert the Tubing: Carefully thread the new tubing through the earmould, ensuring it passes through smoothly. Use pliers if needed to help position the tubing accurately.
3) Securing the Tubing
Once the tubing is threaded through the earmould, check to ensure it fits securely. It should be snug but not overly tight. If the tubing fits securely without glue, you can proceed to the next step. However, if it feels loose, apply a tiny amount of hearing aid-safe glue to secure it in place.
4) Final Adjustments
After you’ve completed all the steps, firstly trim any excess tubing to ensure a comfortable fit. Next, attach the earmould back to the hearing aid, making sure all components are correctly aligned and secure.
By following these steps, you can efficiently replace your hearing aid tubing, ensuring your devices continue to provide clear and accurate sound. Regular maintenance and timely replacement of tubing can significantly enhance the performance and longevity of your hearing aids.
Explore Our Range of High-Quality Hearing Aid Tubing
At Hearing Aid Accessories, we understand the importance of maintaining your hearing aids for optimal performance. That’s why we offer a wide range of high-quality hearing aid tubing and replacement tools from major manufacturers, ensuring compatibility with various hearing aid brands.
Our Selection Includes:
Our offerings include pre-bent tubes, available in different wall thickness options and moisture-free variants, perfect for custom earmolds. Additionally, we provide thin tubes, which come in brand-specific and model-specific options, color-coded for easy identification for left and right ears.
Our tubing options are designed to meet the diverse needs of hearing aid users, providing reliable performance and durability. Moreover, the selection we offer includes NHS hearing aid tubes, Oticon hearing aid tubes, Phonak hearing aid tubes, Danalogic hearing aid tubes, and more.
Why Choose Us?
At Hearing Aid Accessories, we prioritise quality assurance by sourcing our products from leading manufacturers, thereby ensuring top-notch quality and compatibility. Additionally, our expert team is always ready to provide advice and help you choose the right tubing for your specific hearing aid model. For your convenience, you can easily find and order the tubing you need from our comprehensive online catalog.
Click the button below to browse our range of hearing aid tubing and find the perfect match for your hearing aids.